Warning: include(/home/blog66rr/public_html/wp-content/plugins/hyper-cache/cache.php): failed to open stream: No such file or directory in /home/blog66rr/public_html/wp-content/advanced-cache.php on line 24

Warning: include(/home/blog66rr/public_html/wp-content/plugins/hyper-cache/cache.php): failed to open stream: No such file or directory in /home/blog66rr/public_html/wp-content/advanced-cache.php on line 24

Warning: include(): Failed opening '/home/blog66rr/public_html/wp-content/plugins/hyper-cache/cache.php' for inclusion (include_path='.:/opt/cpanel/ea-php70/root/usr/share/pear') in /home/blog66rr/public_html/wp-content/advanced-cache.php on line 24

Warning: Cannot modify header information - headers already sent by (output started at /home/blog66rr/public_html/wp-content/advanced-cache.php:24) in /home/blog66rr/public_html/wp-includes/feed-rss2.php on line 8
name server註冊 – unethost無限空間虛擬主機 技術分享部落格 https://blog.unethost.com unethost 專注於提供優質的虛擬主機服務及相關問題解答 Tue, 28 Jun 2016 18:13:58 +0000 zh-TW hourly 1 https://wordpress.org/?v=6.0.8 如何註冊自己的 name server ? (透過unethost帳務控制台設定) https://blog.unethost.com/how_to_registry_name_server_at_whmcs_by_unethost/ Fri, 24 Jun 2016 07:28:20 +0000 http://blog.unethost.com/?p=3618 閱讀全文 如何註冊自己的 name server ? (透過unethost帳務控制台設定)]]> 本篇接續:關於網域與dns server(name server) 設定概念

當server端這邊,將name server設定好後;
其實還有一個步驟是,要到網域控制台進行name server的註冊,
否則遇到其他嚴格的網域商,會查驗發現未公開註冊後,
系統就不會給人設定自管,許多人在這邊可能就會卡關了。

以下的設定步驟,因為權限問題,
需在我們這邊註冊的網域才能設置。

<開始設定>

1.請先登入我們的帳務控制台
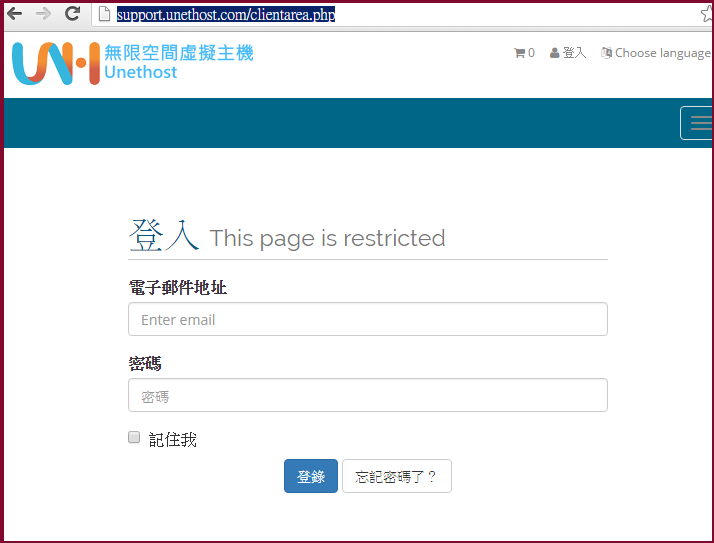
registry_name_server_01

2.網域管理>我的域名
選擇有效的網域 > 在點擊圖示裡的icon工具圖片
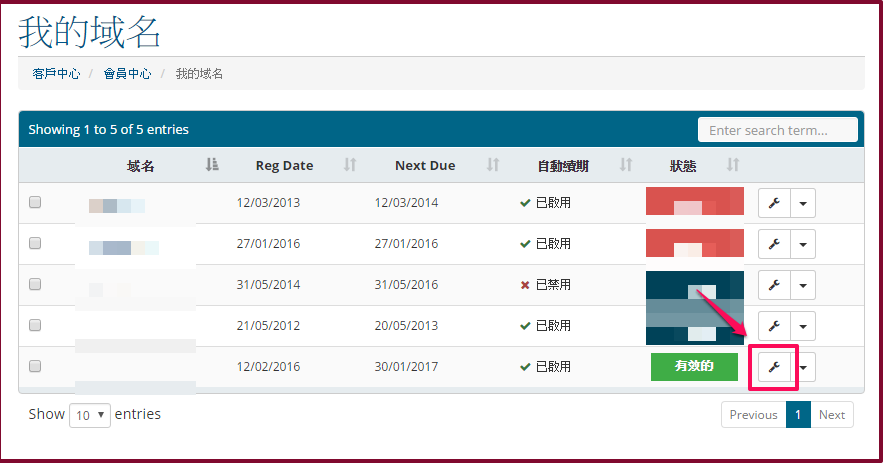
registry_name_server_02

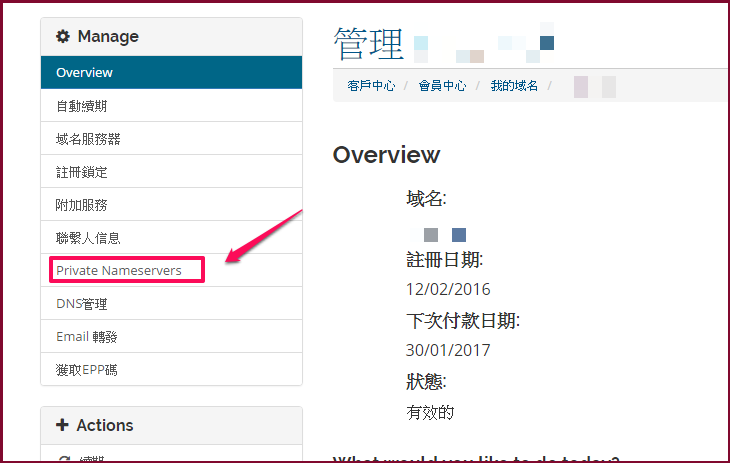
3. 左側選單裡 > Private Nameservers

registry_name_server_03

4. 域名服務器填入: ns1  (建議設為常用是ns1,ns2)
IP地址,要填入跟主機設定的IP同一組。
以上填好後,在點下保存修改。
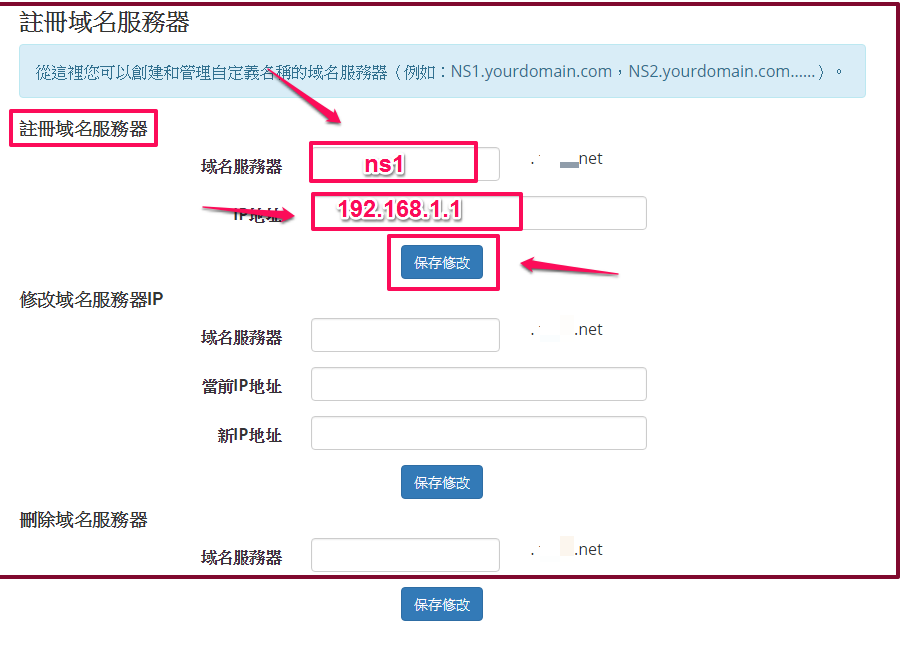
 

registry_name_server_04

另外還有支援修改(修改不同ip)及刪除。


<結論>

如果沒有做這個註冊的動作,比方說被防火牆擋到server的port,
就會導致網域瀏覽異常,有註冊的話就沒這種問題,會少掉很多麻煩。


延伸閱讀:如何檢查 name server 是否註冊成功?

(本篇教學由unethost.com客服撰寫)

延伸閱讀:如何備份Cpanel後台安裝的套裝程式?

安裝上述的軟體,我們提供虛擬主機試用,七天滿意保證,
功能完整使用不受限制,歡迎點我申請。

]]>