Warning: include(/home/blog66rr/public_html/wp-content/plugins/hyper-cache/cache.php): failed to open stream: No such file or directory in /home/blog66rr/public_html/wp-content/advanced-cache.php on line 24

Warning: include(/home/blog66rr/public_html/wp-content/plugins/hyper-cache/cache.php): failed to open stream: No such file or directory in /home/blog66rr/public_html/wp-content/advanced-cache.php on line 24

Warning: include(): Failed opening '/home/blog66rr/public_html/wp-content/plugins/hyper-cache/cache.php' for inclusion (include_path='.:/opt/cpanel/ea-php70/root/usr/share/pear') in /home/blog66rr/public_html/wp-content/advanced-cache.php on line 24
如何利用cPanel建立mysql資料庫? – unethost無限空間虛擬主機 技術分享部落格

如何利用cPanel建立mysql資料庫?

cpanel_wp

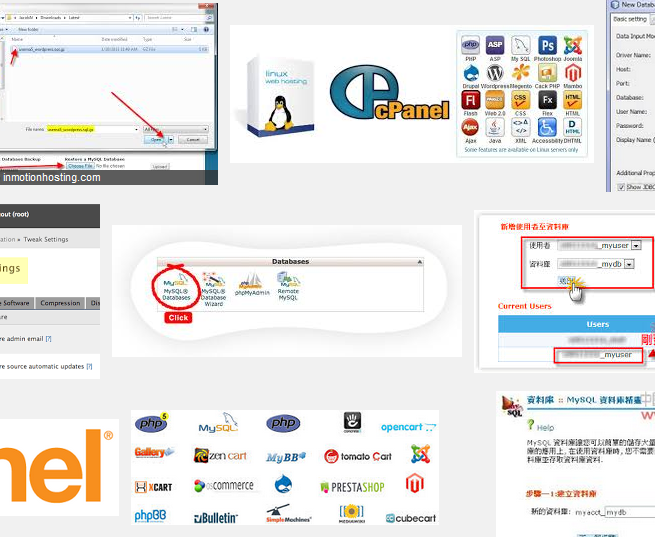
cpanel控制台的直覺式圖形化操作,可以讓不懂linux的使用者,快速的進行網站空間的管理,以下我們更進一步的說明,在cpanel裡建立mysql的db name, db user, db password的方式。

建立資料庫教學(MySQL)

步驟1: 進入cpanel後台,點選MySQL資料庫

1


步驟2  首先請先建立「資料庫」,請輸入資料庫的名稱並點﹝Create Database﹞。


2


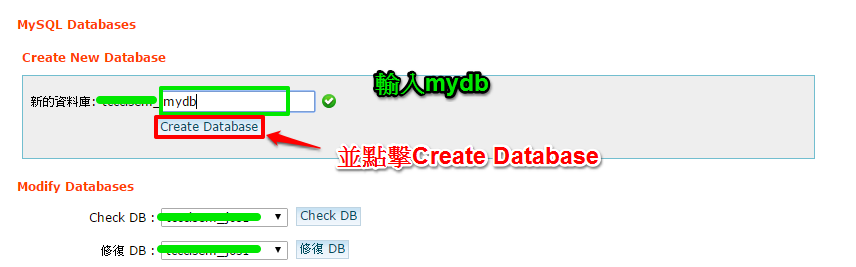
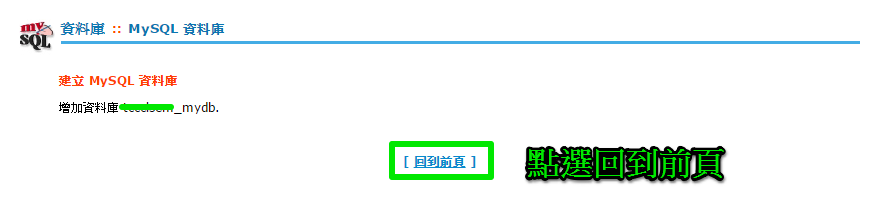
建立完成後台會顯示您資料庫名稱,請點「回到前頁」

3


4


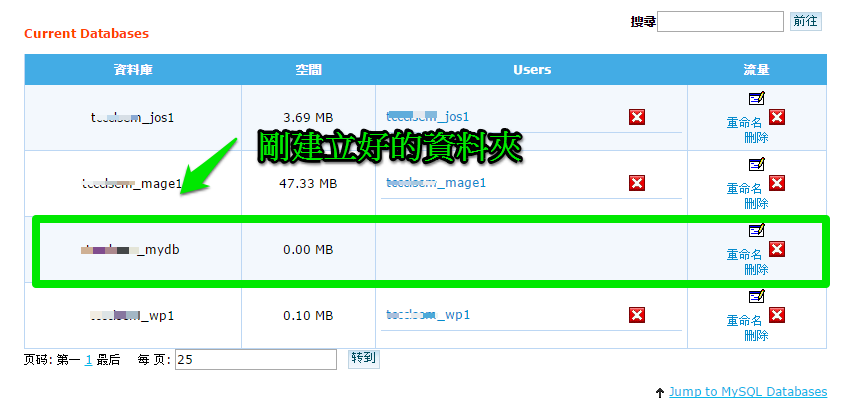
步驟3:  回到前頁後,會看到剛剛建立好的資料庫,接著畫面往下,找到「Add New User」建立一位資料庫的使用者。依序輸入資料庫使用者名稱、密碼、重複密碼,並點﹝Create User﹞。

註:如果不知設甚麼密碼,也可以點選密碼產生器,產生一組安全性高的密碼

5


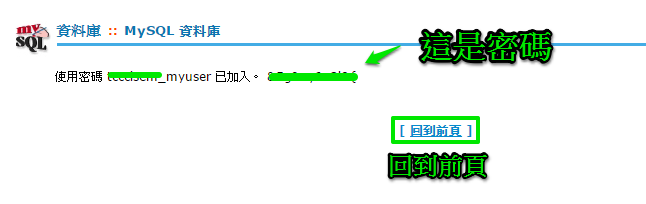
點選create user,進入此頁面,記得把密碼記下來,因之後無法查詢。

6

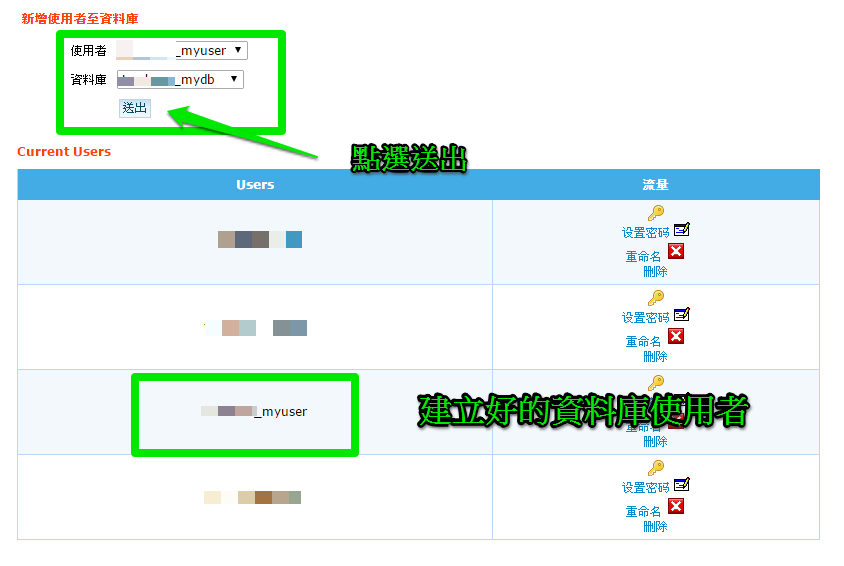
步驟4: 找到「新增使用者至資料庫」,在使用者欄位找到剛建立的使用者,再到資料庫找到剛建立的名稱,並點送出。

7


步驟5: 接著會顯示使用者名稱和資料庫名稱,勾選「ALL PRIVILEGES」給予新的使用者有權限可以管理這個資料庫。8

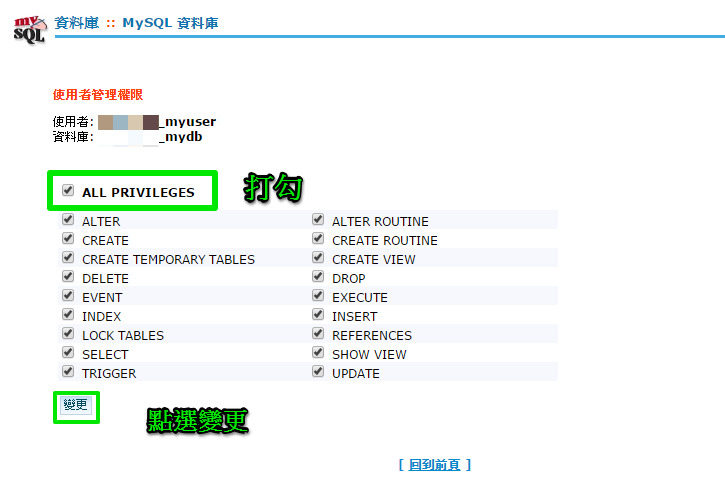
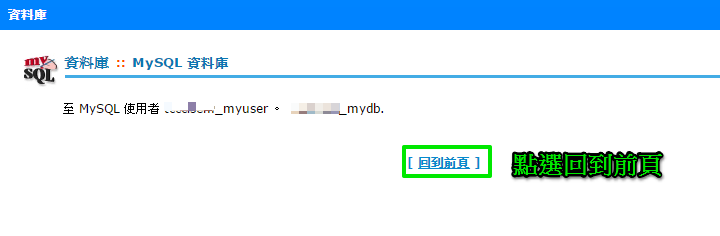
步驟6: 這樣就完成了,把資料庫的使用者、密碼、資料庫名稱輸入到架站程式上即可。

9

(本教學由unethost.com客服人員-Leo完成)


操作上述的軟體,我們提供虛擬主機試用,七天滿意保證,
功能完整使用不受限制,歡迎點我申請。