我們在如何設定自己的套裝軟體透過gmail smtp發信,曾介紹過使用外部smtp的方式,不外乎解決DKIM及SPF不會設置的一種方案。
unethost.com虛擬主機,配合cpanel開創e-mail,有著快速生成DKIM及SPF的方式,
其操作步驟如下:
1. 請先使用自己的帳號,登入自己的cpanel控制台。
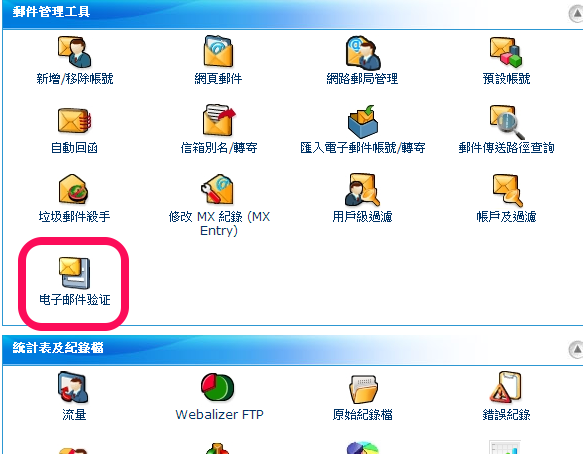
2. 郵件管理工具>電子郵件驗證
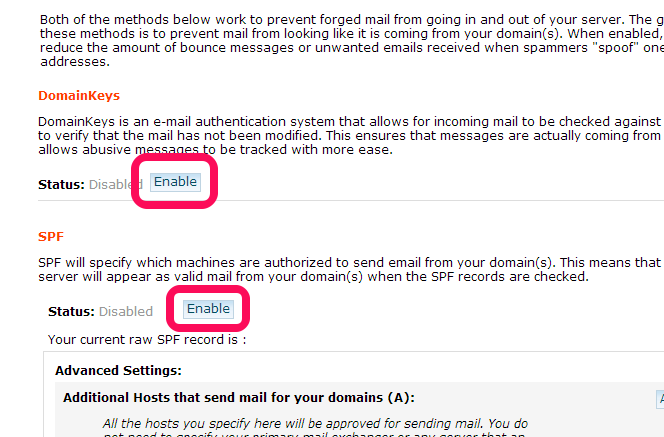
3. 請將 DomainKeys(DKIM) 及 SFP ,都點下Enable
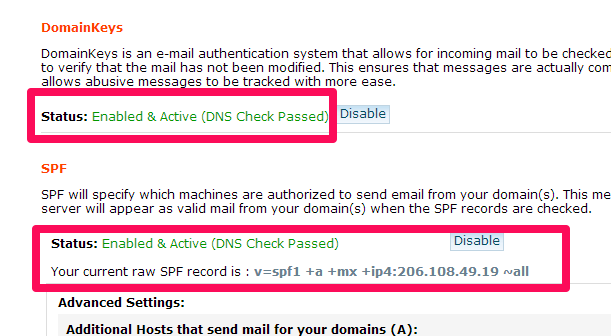
4. 開啟後的狀態
5. 驗證DKIM及SPF
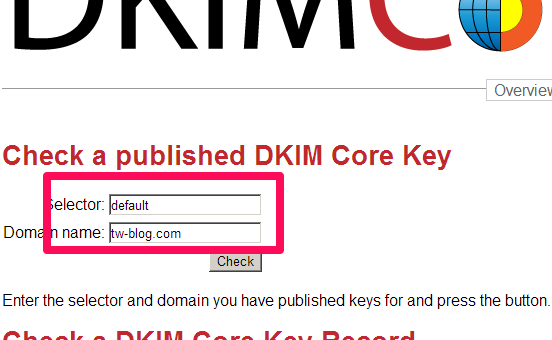
5-1: 驗證DKIM的網站: http://dkimcore.org/tools/keycheck.html
5-2: Selector 請輸入 default , Domain name 則是填入域名,填入後點下check
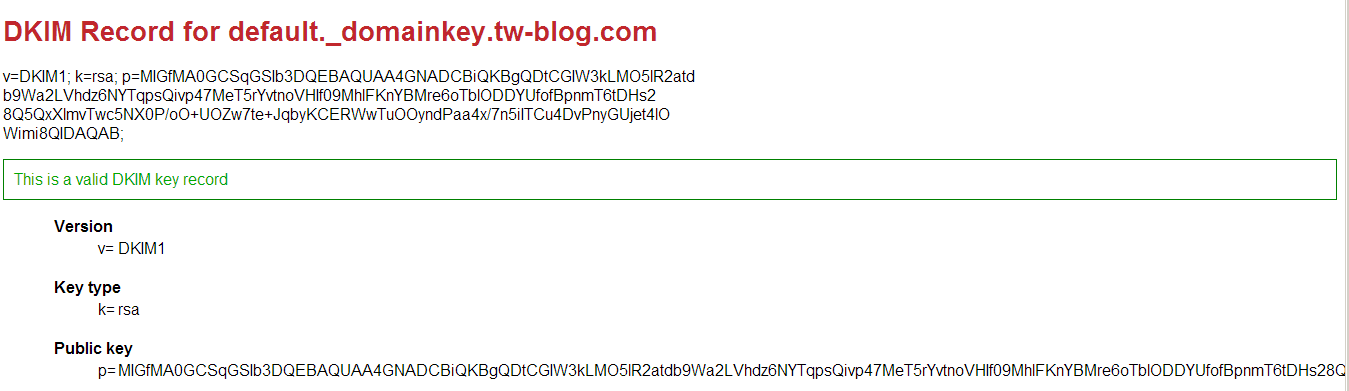
5-3: 驗證成功後,會跑出相關資料
5-4: 驗證 SPF 的網站: http://www.kitterman.com/spf/validate.html
5-5: Domain name 請填入網域名稱,在點下Get SPF Record (if any)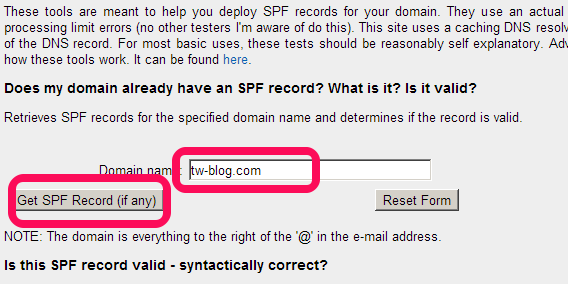
5-6: 驗證成功的資料

6. 其他需注意的地方是,需將domain name 的name server,先設成我們空間帳號內所分配
的,否則還得手動的,在網域管理去設定相關record。