Warning: include(/home/blog66rr/public_html/wp-content/plugins/hyper-cache/cache.php): failed to open stream: No such file or directory in /home/blog66rr/public_html/wp-content/advanced-cache.php on line 24

Warning: include(/home/blog66rr/public_html/wp-content/plugins/hyper-cache/cache.php): failed to open stream: No such file or directory in /home/blog66rr/public_html/wp-content/advanced-cache.php on line 24

Warning: include(): Failed opening '/home/blog66rr/public_html/wp-content/plugins/hyper-cache/cache.php' for inclusion (include_path='.:/opt/cpanel/ea-php70/root/usr/share/pear') in /home/blog66rr/public_html/wp-content/advanced-cache.php on line 24
如何編輯或產生自訂的404頁面(自製特色錯誤頁面) – unethost無限空間虛擬主機 技術分享部落格

如何編輯或產生自訂的404頁面(自製特色錯誤頁面)

當訪客瀏覽到不正確的資料夾或是檔案,
除了使用web server內建的錯誤訊息,
如果想要修改這個頁面,該如何進行呢?

請參考我們下列的說明:

<使用cpanel內建的功能>
1.請先登入cpanel控制台


2.搜索:錯誤頁面

editor_cpanel_error_pages_01


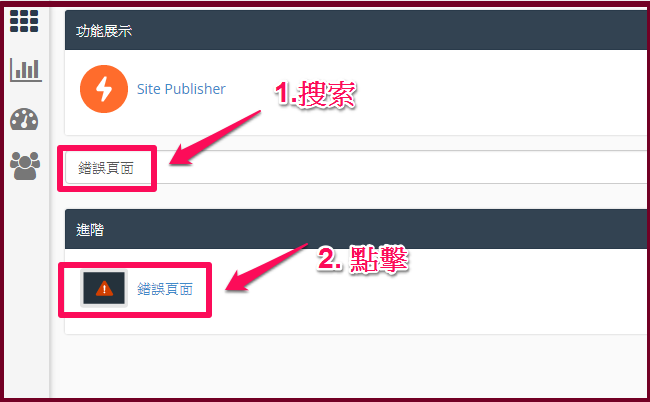
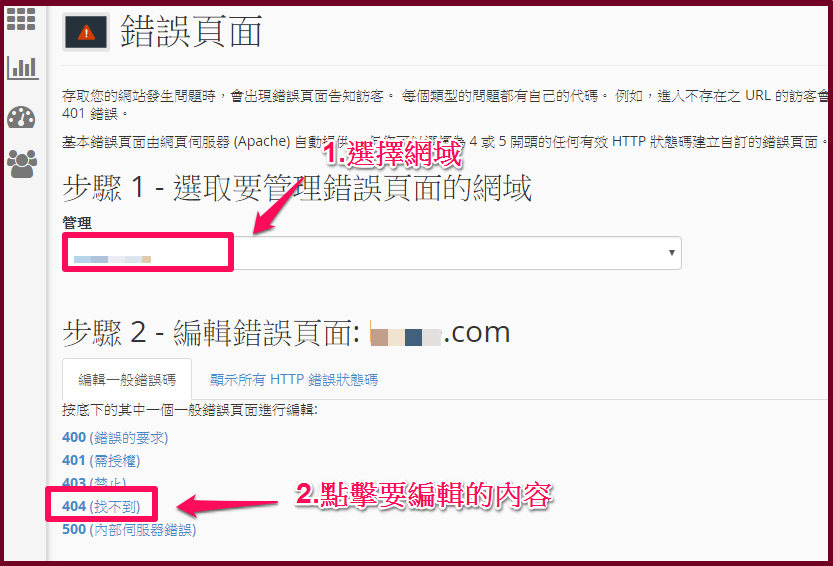
3.選取要設置的網域,在選擇要編輯的頁面(最常見的是404)。
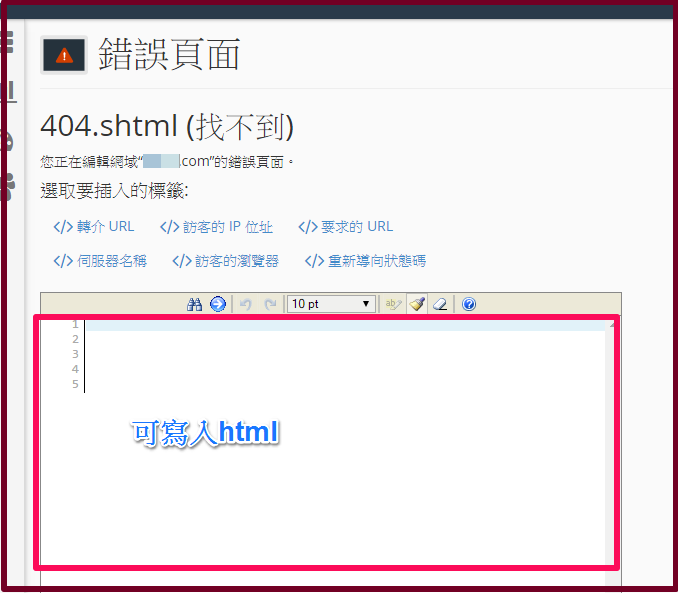
editor_cpanel_error_pages_02


4.在編輯的對話框內,可以寫入html
編輯完成後,要記得到左下角的儲存。
(另外可以使用內建的六種語法,點下去就可以使用。)

editor_cpanel_error_pages_03


如果覺得上列步驟有點慢,
可以參考下列改法。


<修改.htaccess>

1.將已經編輯好的頁面,比方是 error.html
上傳到 /public_html。

2.直接將下面這一行語法,擺到 .htaccess裡
ErrorDocument 404 /error.html

這樣訪客的404,就會直讀 error.html

3.其他錯誤頁面則是:

ErrorDocument 403 /403.shtml
ErrorDocument 404 /404.shtml
ErrorDocument 500 /500.shtml

(為方便查詢,建議檔名就是錯誤頁面名稱)


以上兩個操作方式,都能協助修改錯誤頁面,
依各人喜好進行編輯即可。

但需注意的部份是,如果 .htaccess 已有其他語法,
編輯cpanel的錯誤頁面可能會有衝突,
所以優先權是 .htaccess > cpanel編輯


(本篇教學由unethost.com客服撰寫)

延伸閱讀:如何備份Cpanel後台安裝的套裝程式?

安裝上述的軟體,我們提供虛擬主機試用,七天滿意保證,
功能完整使用不受限制,歡迎點我申請。